Time Travel
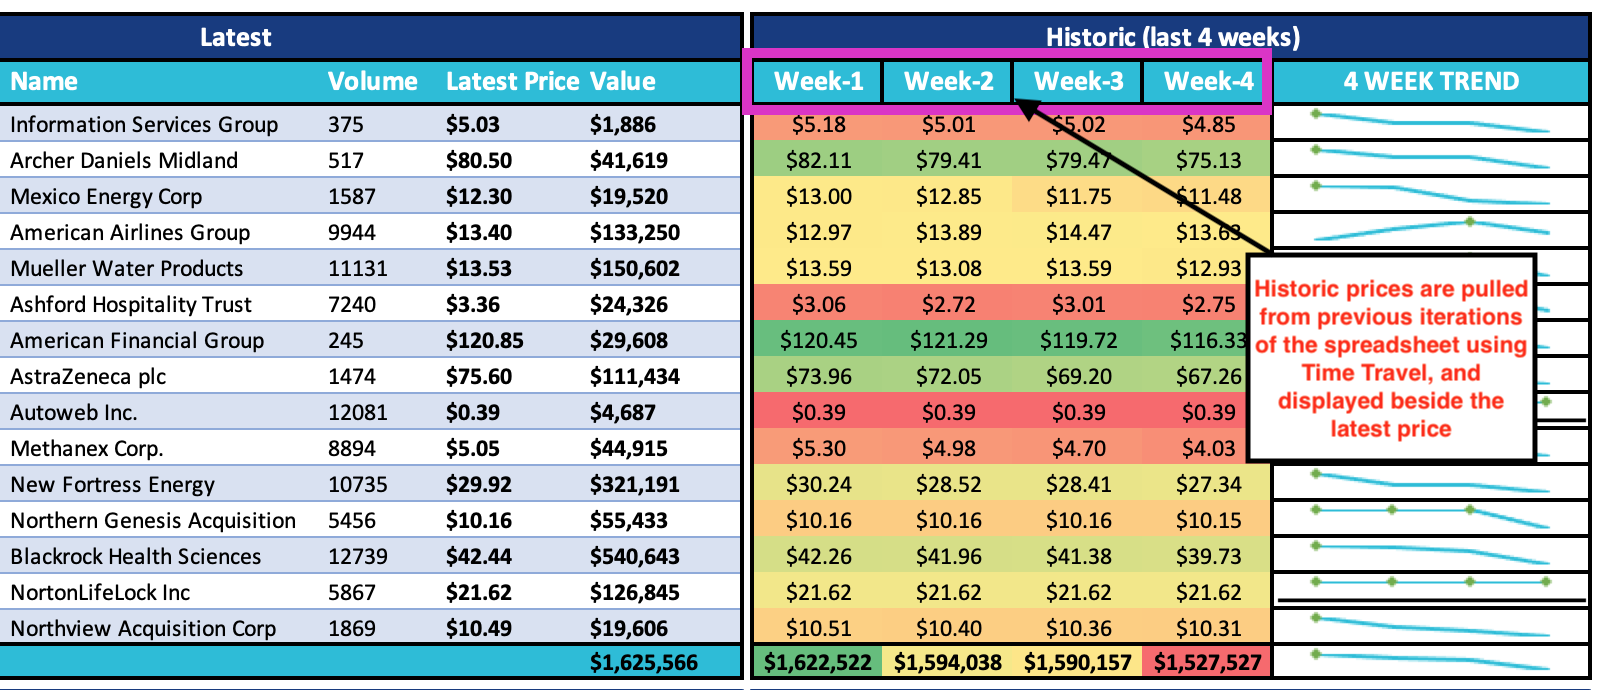
Time Travel is Sheetloom's ability to inject previously generated historic data directly into a woven sheet at runtime, allowing side-by-side comparisons of current versus past data.

Time Travel Configuration
1. Save selected results to Time Travel
Select the range in the template to save as a Time Travel snapshot and name it in the following format:
chosen_range_name.timetravel.save
For example, a range in the template shows cost of sales by job order ID. To save the results of this range only to Time Travel, create a named range for it called:
costofsales.timetravel.save
The first time a snapshot is created at runtime, it is saved to a folder that is automatically generated. The path to the snapshot, from the Time Travel page, is:
Timetravel/Name_of_template/name_of_snapshot/
e.g. Timetravel/coolcargo/costofsales/
The snapshot is now available for use in the template.
2. Incorporate a Time Travel snapshot into a template.
With Time Travel setup to generate and save the snapshot, another named range that pulls in the snapshot in future refreshes is added into the Excel template.
Sheetloom can be configured to pull from a relative point in time (e.g., from 2 days ago, three weeks ago) using a Time Travel lagging feature.
2. 1 Incorporate a relative point in time snapshot into a template.
Sheetloom can display a historic snapshot relative to different time periods, e.g., from one day ago, two weeks ago, three quarters ago, etc.
Create a new named range for the snapshot data. The name for the range comprises the initial range name supplied, the Time Travel instruction, and the time lagging instruction in this format:
chosen_range_name.timetravel.lag.lag_time_interval_type.intervals_elapsed
For example, cost of sales data from one day ago, three days ago, one week ago, one year ago, etc.
Using the previous example, the cost of sales snapshot from five days ago is written as:
costofsales.timetravel.lag.day.5
When Sheetloom runs it will inject the cost of sales data from today-5 into the named range.
Time Travel currently supports the following lag periods: day, week, month, quarter, year, as well as the first and last created snapshots.
3. Preview a Time Travel Object
Navigate to the Time Travel page and select the object. The Preview context button displays. Click it to open a preview of the data.
4. Delete a Time Travel Object
Navigate to the Time Travel page and click the ellipsis on the right of the row the object is on. Click delete and confirm.
Time Travel is a method to enable historic snapshots to be injected directly into a sheet at runtime, avoiding the need for manual copy and paste to blend data after each iteration.
A Time Travel reference only works in a named range. It will not work in a worksheet tab.
A Time Travel object must be added to the template it was originally generated in. It will not function if it is added into a different template.