Custom Columns
Introduction
During the initial CSV upload process, a custom column with a pre-assigned default value for each row can optionally be added to aid filtering on appended files at runtime. There is no limit to the number that can be added.
The custom column name is selected during the upload process from a dropdown list of existing Sheetloom parameters; therefore a prerequisite is that the custom column name has previously been added as a parameter
At runtime the default value for the custom column is input as a query filter in the same way as any other parameter in Sheetloom.
This feature permits Sheetloom to filter on data from a specific appended CSV, which will be necessary if data in the originating CSV columns do not support this requirement.
Add a Custom Column
Navigate to the CSV page and click Upload CSV. Check the box to confirm the CSV has headers and choose the CSV file. The upload dialogue box is displayed. See CSV upload for details of handling data types
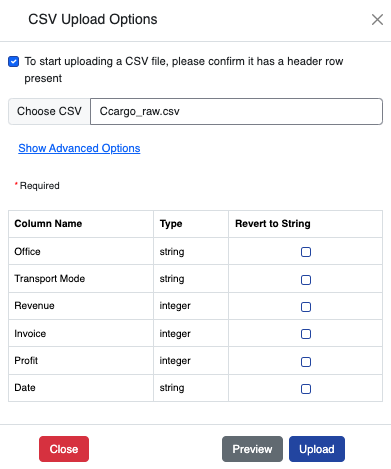
Click `Show Advanced Options`. The custom column configuration box displays.
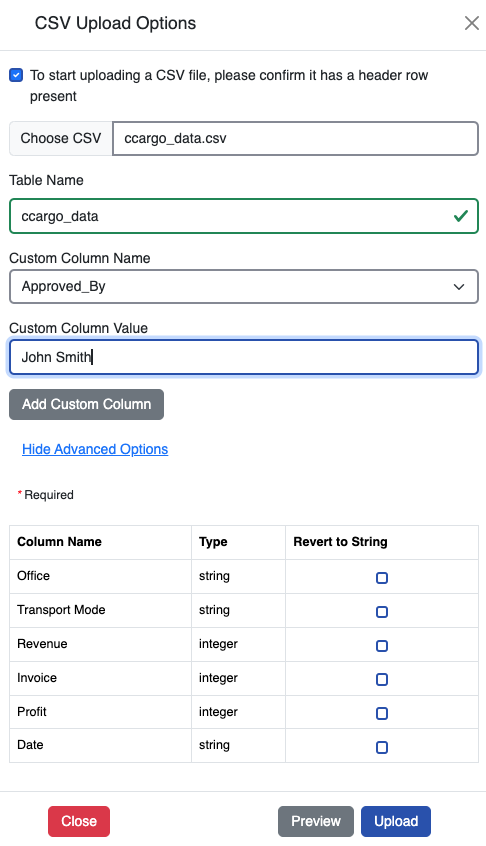
Click on the Custom Column Name dropdown and choose an existing parameter to use as the custom column name. To create a parameter for a custom column if it does not exist, see create a parameter.
In this case the “Approved_By” parameter is chosen. This enables filtering on who approved the figures at runtime.
Enter the default Custom Column Value. In the image, this is John Smith-the manager who approved and loaded the figures. As other managers may load future CSVs, the custom column allows filtering on who approved what.
Click Previewto check the data.
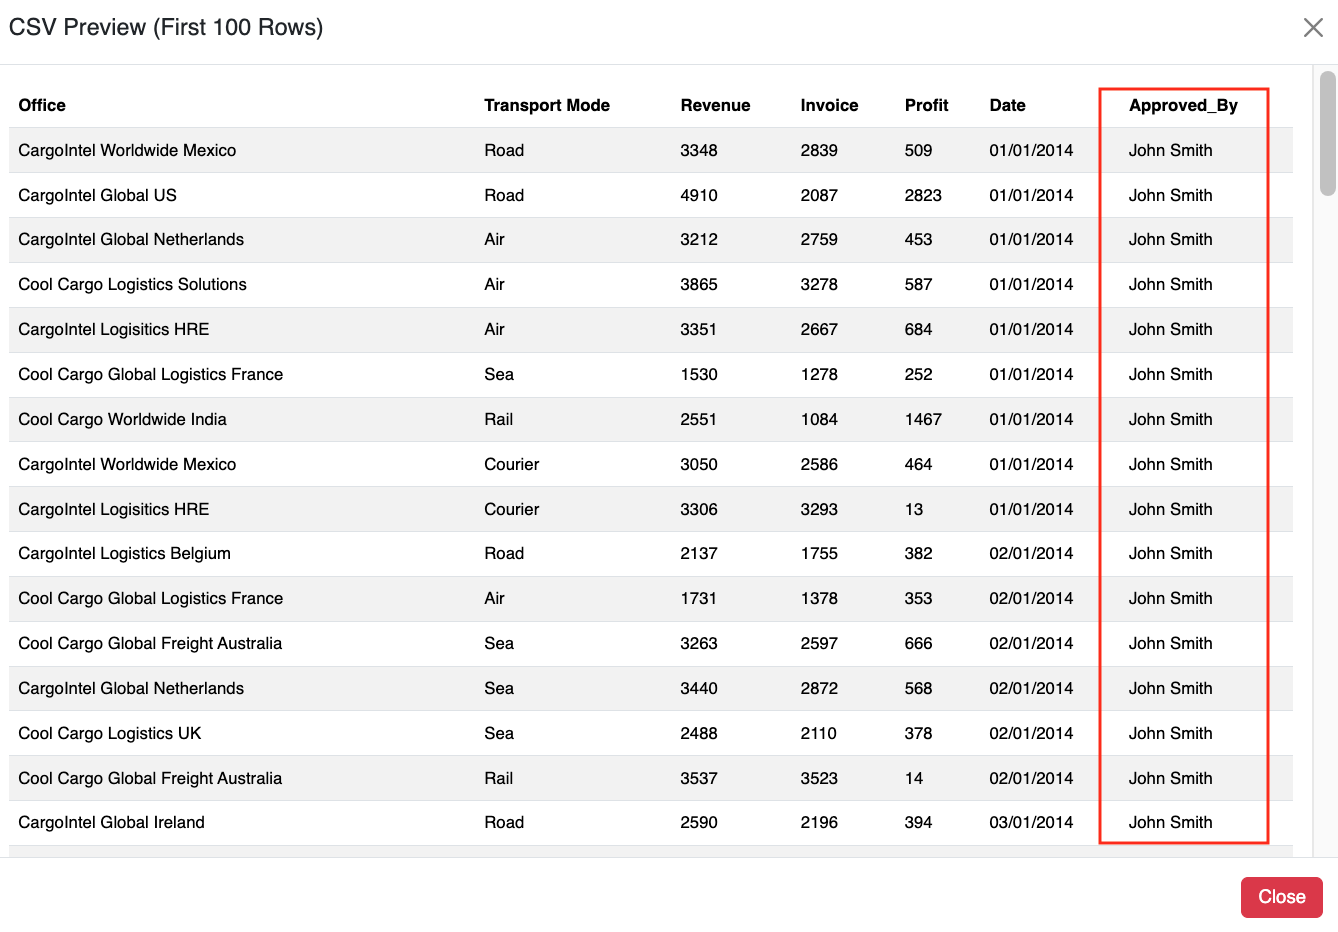
Close the Preview and click Upload.
The CSV uploads and a database table is created containing the custom column with the default value. Notifications confirm when these are done.
Append CSV With Custom Columns
Navigate to CSVs and click the folder where the CSV file is located.
Click Append CSV. Click to confirm the CSV has a header then choose the CSV. The file cannot have the same name as the existing CSV.
The CSV uploads. A dialogue box for the custom column default value displays. Input the required default value. In this case “Mary.Brown” has been input to indicate that this is the manager who approved the figures in this CSV file”.
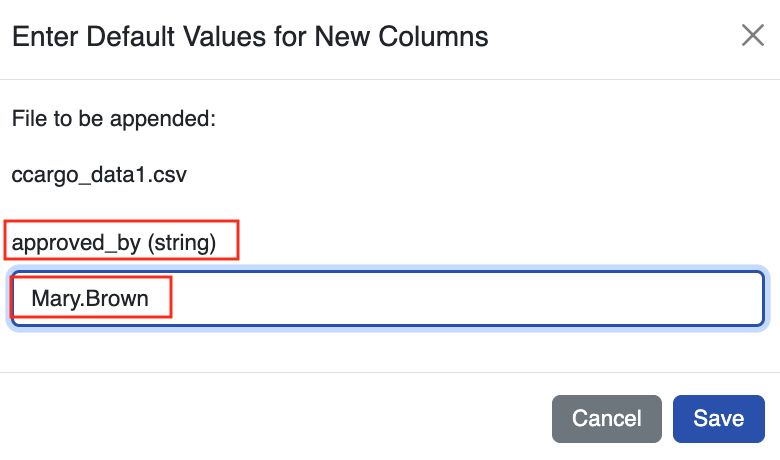
Select Save. Select Preview to view the data.
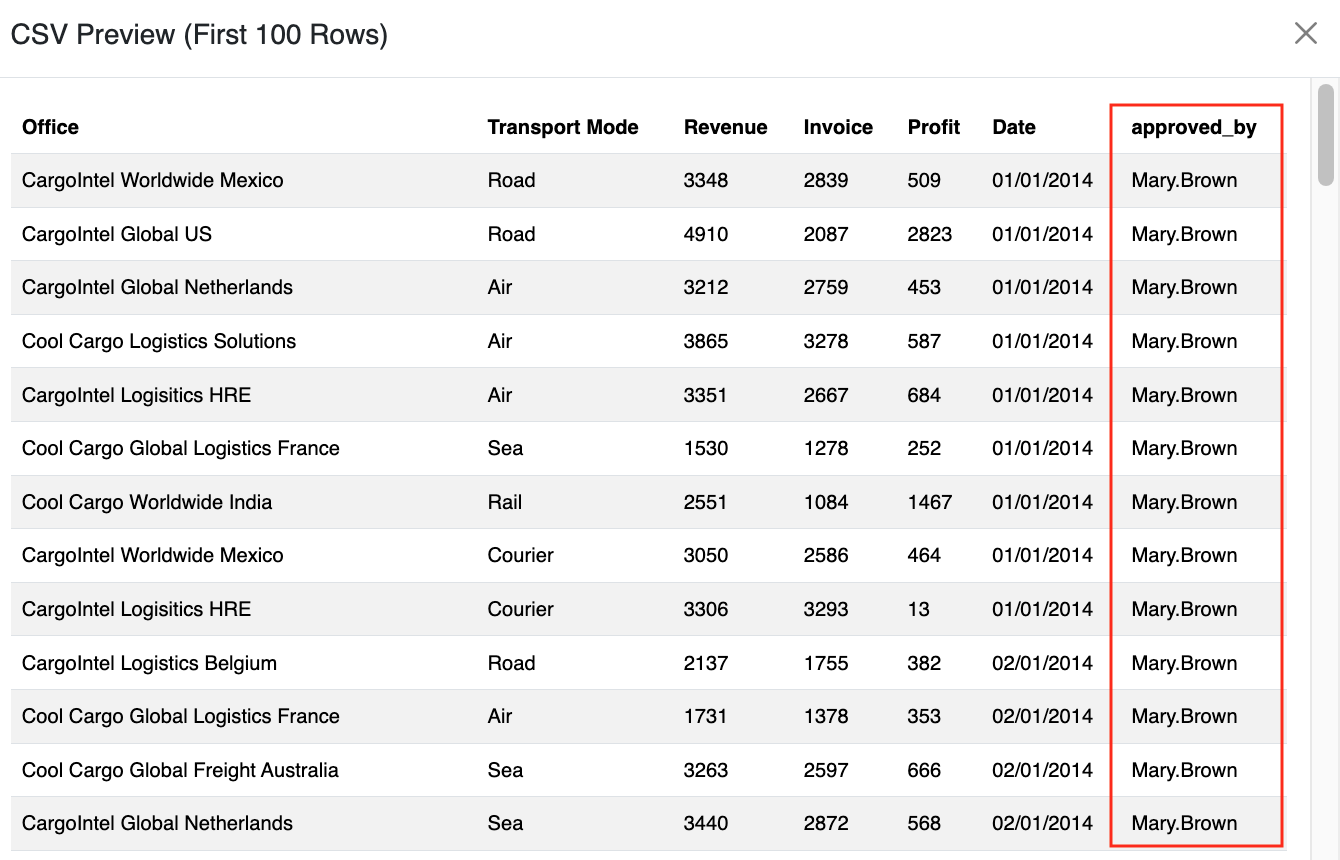
Close the Preview and click Upload.` The new CSV uploads and is added to the CSV folder, and the database is appended.
Bulk Append cannot be used to append a CSV containing custom columns. CSVs must be appended individually.